Friday, September 29, 2017

Meet the Queen that wears the Rusty Crown

Hi Everyone,
Today we are introducing you to the woman behind the curtain.  The lovely Martina answered some questions that the design team had for her.

Q:  How did you decide to open an online store?

A:  I have always wanted a brick and mortar store and for some reason it just never came to be.  My sister and our friend opened one(a brick and mortar) in Washington and had it for 10 years.  I just knew that I would have some kind of a craft store one day.  After they closed down I thought now is the time to do this if I'm going to do it.  So, My Rusty Crown came to be. 

Q:  How long have you been in business?

A:  The store has been open for 18 months now. 

Q:  How did you pick the name for you store?

A:  I love rusty things and I love crowns.  There you go!

Q:  How long have you been crafting?

A:  I started when I was 21 and have been going now for about 37 years.  Anything and everything that caught my eye.

Q:  What's your favorite kind of project?

A:  Paper crafting has got to be(so far) my favorite thing to work on and with.  Stencils are my first love.  Anything that brings texture I'm there.

Q:  What type of crafting or craft product would you like to learn more about?

A:  I would really like to learn more about Gelli plates and making backgrounds with them.


We also asked Martina to share three pieces of art she has created.


 We hope you enjoyed meeting the awesome Martina.  Next week you will get to meet the members of the design team. 


Friday, September 22, 2017

Building a city


Hello!
In this video can you se how I made a card with Tim Holtz lovely paper dolls and houses from his thinlits dies. I've used stone paste and rust paste from Finnabair and metal embellishments from Prima.

Best regards Milo Lilja


Friday, September 15, 2017

The Strange Case of Amelia Hardy

Hey Guys,
I am so excited about this project! Almost everything on it can be purchased at My Rusty Crown.
I used the medium sized etc tag from Tim Holtz. The tag is about 6.5 x 12 inches and is made from thickboard. 
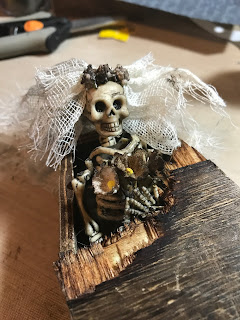
I started the project by making my corpse bride.  Her veil is cheesecloth and her flowers are vintage both have been spritzed with Walnut stain distress spray. Hot glue holds her hands in place and a big blob keeps her in her coffin. I used the Tim Holtz coffin and smashed the lid with a hammer.  I scored the wood when I wanted to break it and went to town.  The broken bits have been covered with Walnut Stain Distress Stain. 

To make the dirt clinging to the bottom of the coffin, I added Grit Paste to the bottom and then painted it with Vintage Photo Distress Paint. Once the paint was dry I stippled on Walnut Distress Stain.  I didn't add grit paste to the back side of the coffin since I knew I would be gluing that to the tag.  This also came in handy hen I needed to let the coffin dry. 

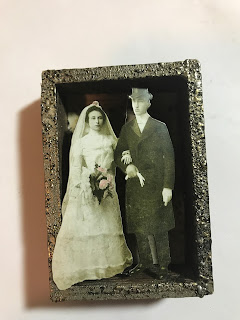
While the coffin dried, I grabbed the smallest vignette box and it was given a quick coat of Charred Gold Embossing powder on the edges. The paper is from the Tim Holtz Wallflower paper stack.  I ran Walnut Stain Oxide Ink on the top and spritzed it with water.  It makes it look like old water stained wallpaper. 
I added the happy couple from the new ancestor paper doll pack. Her roses got a tiny pop of color using Distress Marker in Worn Lipstick. 
The tag was covered with a piece Wallflower paper.  I randomly added Crazing Medium to the tag and let it dry.  Once it was dry I ran Walnut Distress Stain on the tag to let it seep in the cracks. Then I used my splatter brush to flick on Black Soot Distress Paint.  
This sketchy dude(from the ancestor pack) was colored using Distress markers and added to a Scrabble tile holder I colored using Walnut Stain Distress Stain.  The baseboard was given a really thick coat of Distress Rock Candy paint.  I didn't sand the baseboard and a bunch of the rock candy flaked off.  I ran with it and just colored what stayed on with Walnut Stain.  It worked in my favor as it looks really gross and creepy up close.  
Time to add details.  He has some poison vials, moss, and a skull sitting next to him.  The vignette box is their wedding photo.  

So, when you put the story together you discover that he was not a happy husband.  


You can see I added moss in the coffin and underneath the coffin too


Distress Crayon in Black Soot was added around the Halloween Clipping stickers and on the edge of the tag.  I also scribbled with gel pens. 

I hope like this as much as I do! Happy Halloween,
Jess


Friday, September 8, 2017

Altered Composition Books Featuring Character Constructions

Hello!! Jennalee here today. I am so excited to share with you my first post for the brand new
 My Rusty Crown blog!! 

Does your heart skip a beat when you see the school supplies hit the shelves? Brand new notebooks and crayons still take my breath away. There is just something so classic about a black and white Composition Book. The promise of all those blank pages. 

A basic inexpensive Composition Book is where this project started. But I amped them up with the help of some my favorite Character Construction stamps and dies.  


For this first book I used the Paris Flea No.1 Stamp Set


 I stamped the Paris Flea girl onto vintage dictionary paper and colored with the Paris Flea No. 1 Die 
I cut out the doll. Using the same die I cut the doll shape from a piece of scrapbook paper. I trimmed to size for the doll's bodice. 

Using the crown and heart necklace from the Paris Flea No. 1 Die. I stamped and embossed each piece and used an exacto knife to cut out all the small pieces. 

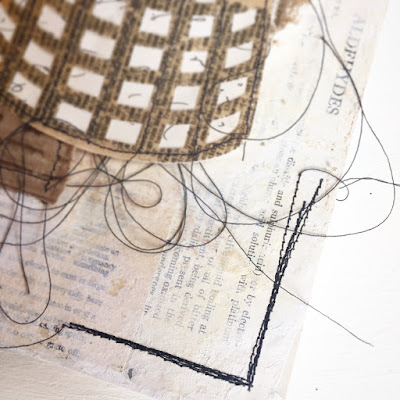
For the base of the doll I die cut a dress form using Tim Holt's Sewing Room die. I of course snuck in some messy stitching on the skirt piece. 

On the spine of the book I adhered a piece of vintage dictionary paper, and ran a length of pom pom trim town the front cover only. I added a "Noted" label in the bottom right corner and a messy stitched corner detail to the upper right corner. 


Book #2 features one of my very favorite Character Construction stamps the 

To start I lightly sanded the front cover of this pink and white polka dot notebook. I then stitched down an Ex Libris book plate cut from a piece of scrapbook paper. 


I stamped the bebe doll onto a vintage dictionary page and colored with soft pastels. 
I then took a needle and poked the holes of her corset. Using a thick craft thread I hand sewed her corset lacing. To finish off this quick and simple book I added a black bow to spine. 


Book #3 is full of vintage charm and showcases the French Laundry No. 6 Die 


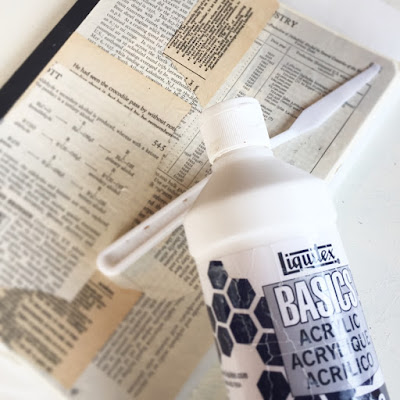
To begin cover the inner pages with parchment paper to protect them from the wet mediums that will be added. Using a variety of book pages collage both the front and back covers using Matte Medium. 


After Matte Medium has dried add a layer of gesso to both covers using a palette knife. I like to add a couple layers of gesso, allowing each layer to dry. Adding thin layers builds up texture. 


Once the gesso is dry add some aging with Distress Oxide. I used Antique Linen and Vintage Photo. I
simply swiped the ink pad across the cover. To activate the Oxide effect lightly spray your cover, taking care not to saturate it. Heat set the Oxides. 


With French Laundry No. 6 Die die cut skirt from a piece of resin paper. Using a contrasting piece of book text line the back of die cut skirt. To attach messy stitch die cut to background piece. Stitch on a piece of black ribbon as a belt and add a button. 


For the background remove the top layer on a piece of cardboard to reveal the corrugation. Layer the lace piece and cardboard on book cover and stitch down. Using Matte Medium adhere the skirt on top of cardboard piece. Add a small number sticker from Tim Holtz's Idea-ology Clippings Stickers.


To finish the spine attach a length of lace along collaged edge. Finish off by adding a label plate and stamping out "Notes" with mini alphabet stamps. 


Add messy stitching to the top and bottom corners.


I had so much altering these simple Composition Books. They will be the perfect place to write all of my crafty to do lists and dreams. 

If you pick up a couple of books for yourself stop by the My Rusty Crown Inspiration group and share with us!! 

Thanks so much for stopping by. Happy Crafting ~ Jennalee 


Friday, September 1, 2017

Welcome!


Hi Everyone,


We are so excited to be bringing you a brand new blog! We will be introducing ourselves over the next couple of weeks and posting tutorials too.  Please join us in our Facebook group and on Instagram too.  We will be posting something every Friday for you.
 Tell your friends all about us.  You won't want to miss the projects we have coming.
While you wait pop over to the store and check out all the awesome things Martina sells.

Love,
The Rusty Crown Crew